Tutorial: Getting Started with Physhun and Physhun Modeler
This tuturial intruduces the user to using Physhun and Physhun Modeler. The
sources in their entirety can be downloaded from the following links:
In this tutorial, we will model and implement a virtual soda vending machine.
This machine works just like a real soda machine - it accepts money and vends
the soda selected by the customer. If the selection is out of stock, the
machine displays an out of stock message. If the selection costs more than
the customer has put into the machine, it displays the appropriate message.
If the customer selects "coin return", the machine returns the money that has
been deposited. As we use Physhun Modeler to model our Process, it will
generate an XML File containing the definitions for the State Model and all
of its components. This XML file can be read in by Spring's ClassPathXmlApplicationContext
to create an instance of the State Model at runtime. The full XML for the
State Model can be seen here.
Before starting this tutorial, download and install Physhun and PhyshunModeler. Note
that Physhun can be used without Modeler; you may develop your State Model XML
files using whatever tool you prefer. Physhun Modeler allows you to develop
your state models by laying them out graphically.
Physhun and Physhun Modeler can both be downloaded from the sourceforge
project summary page at
http://sourceforge.net/projects/physhun.
1. Define the ProcessObject and Event classes
The ProcessObject is the object that traverses the state model. It is unique
per process instance (think of Orders in an order process, or user-sessions
in a web application) -- when multiple instances of a process are being executed,
each process instance has a single instance of the appropriate ProcessObject
associated with it. The ProcessObject implementation is simply a Java class
that implements the com.wazeegroup.physhun.framework.ProcessObject
interface. Note that you may extend
com.wazeegroup.physhun.framework.ConcreteProcessObject and avoid
having to implement plumbing details.
For this example, we will define our own ProcessObject implementation.
The ProcessObject should contain all of the necessary attributes for a meaningful business object.
If your process object does not need any attributes other than state, you may use
com.wazeegroup.physhun.framework.ConcreteProcessObject. Alternatively, the
PhyshunXML package provides an out of the box process object all of whose
attributes are stored in XML.
Process Object implementation
package soda;

import com.wazeegroup.physhun.framework.ConcreteProcessObject;

public class SodaTransaction extends ConcreteProcessObject {

    private float funds;
    private String lastMessage;

    public SodaTransaction(String id) {
        super(id);
    }

    public float getFunds() {
        return funds;
    }

    public void setFunds(float funds) {
        this.funds = funds;
    }

    public String getLastMessage() {
        return lastMessage;
    }

    public void setLastMessage(String lastMessage) {
        this.lastMessage = lastMessage;
    }

}
Events are asynchronous occurrences that can trigger state changes in the
process. In this example, the events are money being added to the machine, a selection
being made (user pushes the Orange Soda button), or the coin return button being
pushed. In Physhun processes, an event is defined as an object with whatever data
makes sense for the event. No special code or attributes are required.
SelectionButtonPressed event:
package soda.events;

public class SelectionButtonPressed {

    private String selection;

    public String getSelection() {
        return selection;
    }

    public void setSelection(String selection) {
        this.selection = selection;
    }

    public SelectionButtonPressed(String selection) {
        this.selection = selection;
    }
}
FundsAdded event:
package soda.events;

public class FundsAdded {
    private float howMuch;

    public float getHowMuch() {
        return howMuch;
    }

    public void setHowMuch(float howMuch) {
        this.howMuch = howMuch;
    }

    public FundsAdded(float howMuch) {
        this.howMuch = howMuch;
    }
}
CoinReturnPressed event
package com.wazeegroup.physhun.examples.soda.events;

public class CoinReturnPressed {
}
2. Start Physhun Modeler
The Physhun Modeler distribution contains an executable jar file. To start Modeler,
double click the jar file, or by typing java -jar PhyshunModeler.jar from
a shell. Note that Physhun Modeler requires java 1.5 or later.
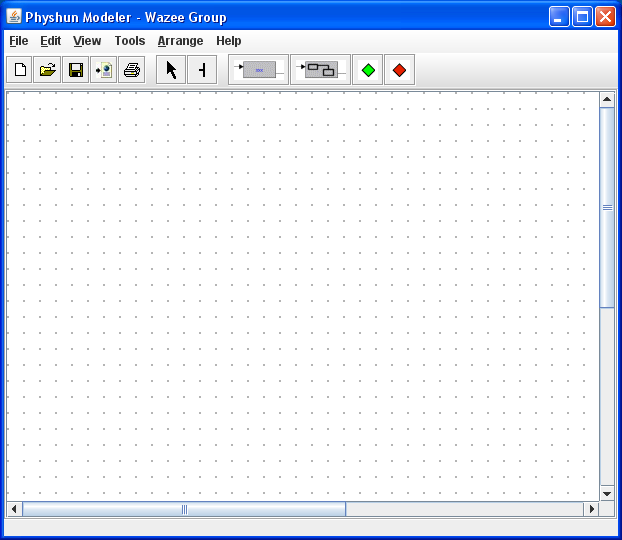
You should see the Physhun Modeler UI open on your screen.

3. Lay out the states and transitions for the state model.
To create a state, select the "New State" button  , then click
on the workspace where you want the state to be placed. To modify the state properties, double click on the state to
open the state editor. In the state editor, you can rename the state, and set
the state as a "Start" state or an "End" state. Every model must define a single
start state, and one or more end states. It
is important to note that all bean names (state, transition, condition and
action names) must be unique and contain no spaces. , then click
on the workspace where you want the state to be placed. To modify the state properties, double click on the state to
open the state editor. In the state editor, you can rename the state, and set
the state as a "Start" state or an "End" state. Every model must define a single
start state, and one or more end states. It
is important to note that all bean names (state, transition, condition and
action names) must be unique and contain no spaces.
To create a transition, mouse over the source state
(the state from which the transition starts). You will see several colored
"ports" appear. Click and drag from a port on the source state to a port on
the target state. You will see an arrow appear pointing from
the source state to the target state. If to add bends to the transition line (for cosmetic purposes),
simply click and drag on the point on the transition line at which you wish to add a bend.
The state model we are defining for this example follows. NewTransaction
is a start state, and "TransactionCancelled" and "TransactionComplete" are
end states.

4. Define actions and conditions for state transitions
Conditions define what circumstances must be met for a transition to
occur. Actions define the logic that is executed when a state transition
occurs. Each Transition must have a single condition and may have a single
action. Actions and Conditions can be defined globally
(as implementations of com.wazeegroup.physhun.Action and com.wazeegroup.physhun.Condition respectively)
, or they can be defined inline on a transition. In this example, we will define our Conditions and Actions
Inline on each Transition.
In this example, we don't have a real
soda machine to interface with, so we will simply print what the soda machine
hardware would normally do (display messages, vend soda, etc.).
First we'll configure the transition from "NewTransaction" to "TransactionInProgress":
Double click the transition to open the transition editor. Set the condition to
"Reference" and select "DefaultCondition" from the drop down list. DefaultCondition
is a Global Condition (global conditions can be referenced my multiple transitions) that simply
evaluates to true if no other transitions from that state evaluate to true. Since
we don't need to execute any logic on this transition, we don't set an Action.
View the transition editor for this transition.
Note the XML window in the Transition Editor (just above the "OK" and "Cancel" buttons.
This is the Bean definition XML for the Transition. Modeler automatically defines this XML
based on your selections in the Transition Editor; however, you may modify this XML directly if
you need more control over the Bean definition.
Next we'll define the transition details for the transition from "TransactionInProgress"
back to itself that occurs when money is added to the machine. The Condition for
this transition is that a "FundsAdded" event occurs. To set this up, open the transition
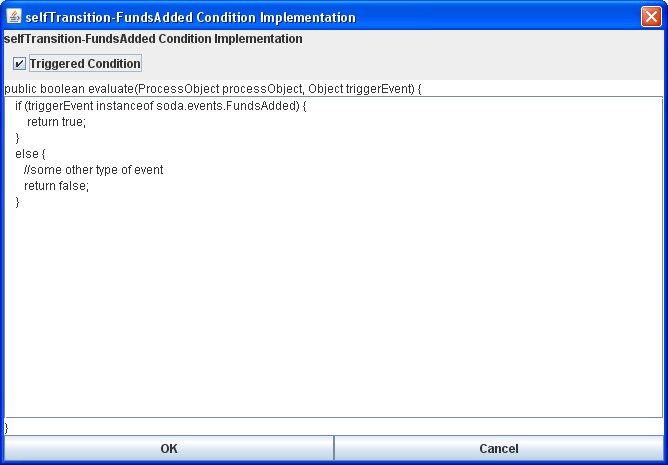
editor for the transition, set Condition type to "Inline Groovy" and click "Edit Condition".
This will open the Inline Java Condition Editor. In this editor, you define the
condition implementation using Groovy. Since the Groovy runtime will execute Java code
generally without change, we can write our Condition and Action code as plain old Java.
Because we want this transition to be a "Triggered"
transition - that is, it is initiated by an event occurrence, mark the condition
as a "Triggered Condition". Any transition with a Triggered Condition will only
be evaluated for execution when an external event is sent to the process instance.
In this example, the external event is sent to the process instance by the UI when money
is put in the machine, a button is pushed or the coin return is pressed. See step 6
for more detail.

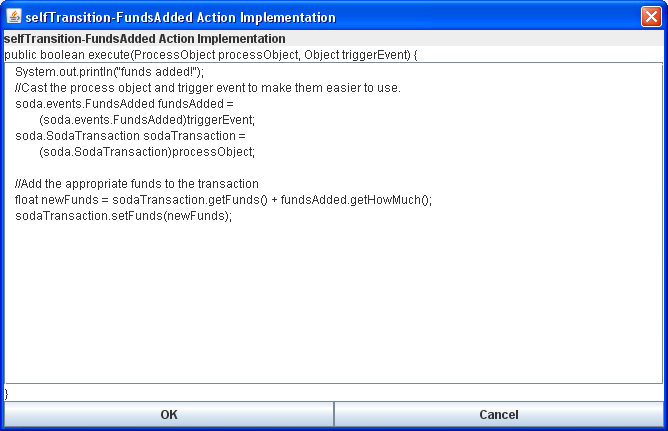
For the Action on this transition, we want to increment the total transaction
funds by the amount that was added. In the transition editor, set the Action Type
to "Inline Groovy" and select "Edit Action". The Action implementation follows:

See the Modeler screens for all of the transitions here:
5. Implement custom Action and Condition classes
Conditions and Actions can be defined as external Java classes if the need
arises. This may be necessary if you have complex logic that you want to maintain
outside of the process model, or if an Action should participate in a distributed transaction.
In this example, we will not define any custom Action or Condition classes
as we defined all of this logic inline. If you did want to implement a custom Action or Condition
it is as simple as creating a concrete implementation of com.wazeegroup.physhun.Action or
com.wazeegroup.physhun.Condition and referencing that implementation in the Condition Editor
or Action Editor in Modeler.
6. Export process model
At this point you have finished defining the process model. Save the model, then export.
Exporting the model creates an XML document (with a .xml extension) that is consumable by a Spring bean factory
and can be executed by the Physhun StateEngine. Note that the Modeler project file (.prj)
is not consumable by a Spring bean factory and can not be executed by the Physhun StateEngine.
To export the state model, select "file -> Export State Model" from the modeler menu.
7. Bootstrap process execution
To execute the process, simply instantiate the Process Object, State Model and
a ProcessContainer instance. Calls to ProcessEngine.executeProcess() will
execute the process and return when the process hits a long lived state or a
termination state. Asynchronous events can be sent to the process by calls to
ProcessContainer.sendTriggerEventToProcess().
Following is a very simple Java class that executes the Soda Process that
we just defined. Alternatively, the downloadable example sources contain
a simple UI (VirtualSodaMachineUI.java) that interfaces with the Soda process we just modeled.
package soda;

import com.wazeegroup.physhun.engine.ProcessContainer;
import com.wazeegroup.physhun.framework.StateModel;
import org.springframework.context.support.ClassPathXmlApplicationContext;
import soda.events.CoinReturnPressed;

public class RunExample {
    public static void main(String[] args) {
        SodaTransaction sodaTx = new SodaTransaction("mySodaTransaction");
        ClassPathXmlApplicationContext ctx = new ClassPathXmlApplicationContext(new String[]{"sodaModel.xml", "soda-processConfig.xml"});
        ProcessContainer container = (ProcessContainer)ctx.getBean("container", ProcessContainer.class);
        StateModel stateModel = (StateModel) ctx.getBean("stateModel");  //inflate and retrieve the stateModel bean.
        container.startProcess(sodaTx, stateModel);
        container.sendTriggerEventToProcess("mySodaTransaction", new soda.events.FundsAdded(0.1f)); // put in a dime
        container.sendTriggerEventToProcess("mySodaTransaction", new soda.events.SelectionButtonPressed("Coke")); //push the coke button
        container.sendTriggerEventToProcess("mySodaTransaction", new CoinReturnPressed());
    }
}
That's it; you should now have a working Virtual Soda Machine. If you are interested
in more examples, including examples involving distributes transaction, download
the examples package from the Sourceforge project page.

©2005-2008 Wazee Group, LLC
|

 , then click
on the workspace where you want the state to be placed. To modify the state properties, double click on the state to
open the state editor. In the state editor, you can rename the state, and set
the state as a "Start" state or an "End" state. Every model must define a single
start state, and one or more end states. It
is important to note that all bean names (state, transition, condition and
action names) must be unique and contain no spaces.


